How to add reviews on Wordpress in 5 mins
Important Prerequisites
Before proceeding with installation, ensure you have:
- Registered your domain in the Commenti dashboard
- Added the specific pathname for your product or page
- Customized your Commenti appearance
Failure to complete these steps will result in Commenti not functioning correctly on your site.
Learn more about how to register >Learn more about how to customize Reviews >Step 1
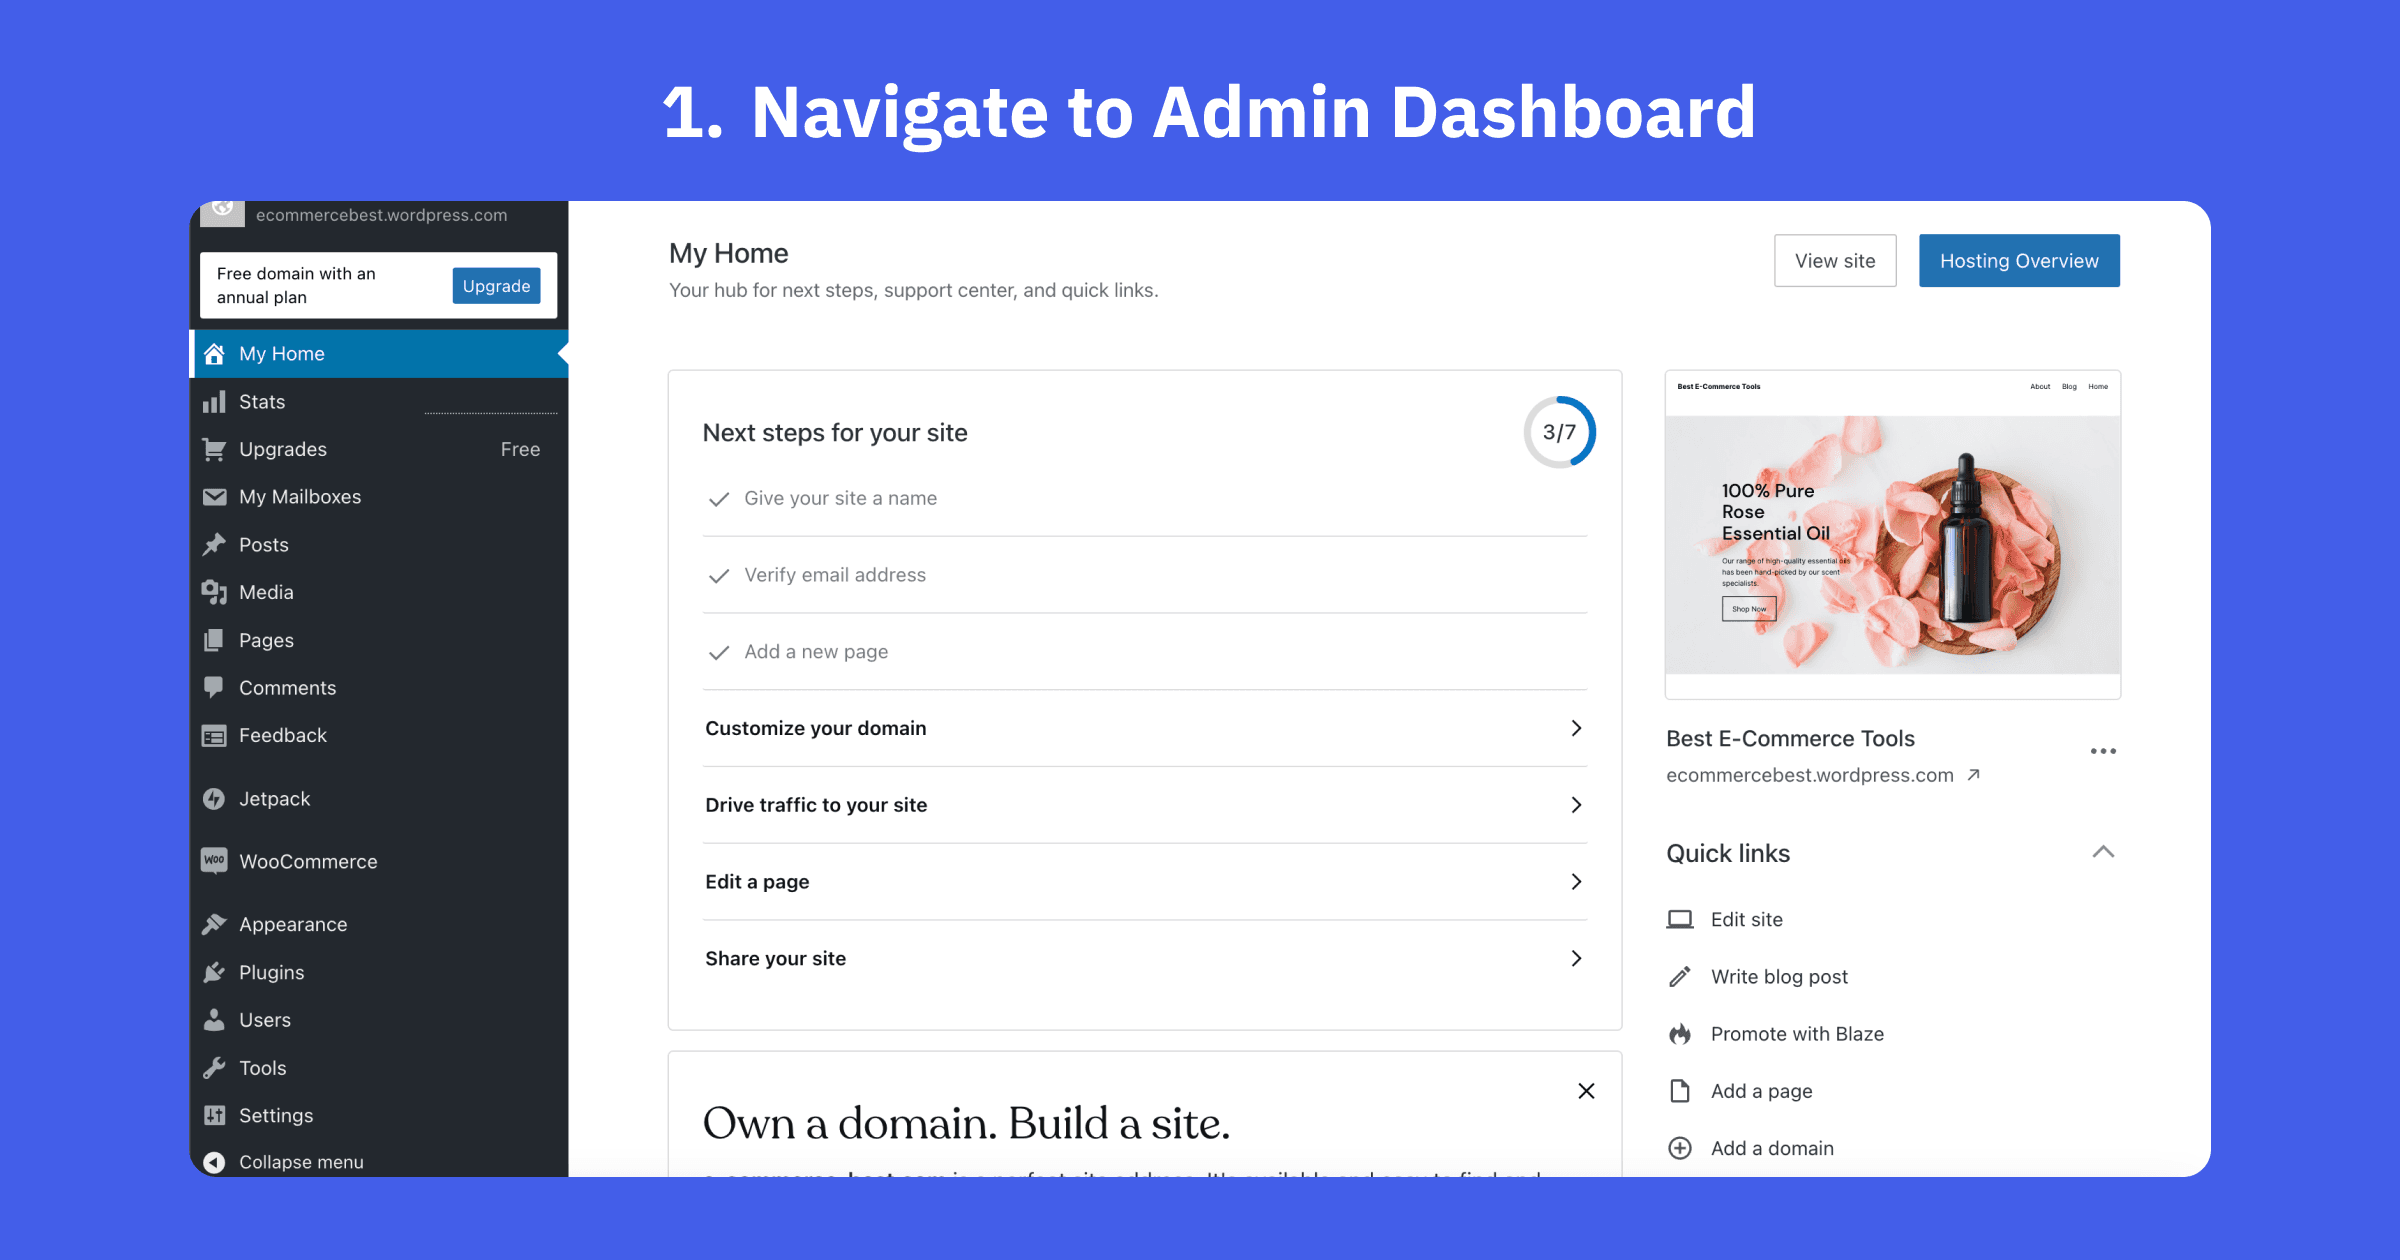
Navigate to WordPress Admin Dashboard
Start by logging into your WordPress admin panel. This is typically found at yourdomain.com/wp-admin.
Step 2

Insert <script> tag to Global Header
To add <script> tag to Global Header in Wordpress website, you need to have business or Commerce plan on Wordpress. Follow this instruction from Wordpress document. Then Paste Commenti script to Global Header.
<script async src="https://package.commenti.co/commenti.umd.js"></script>
Step 3
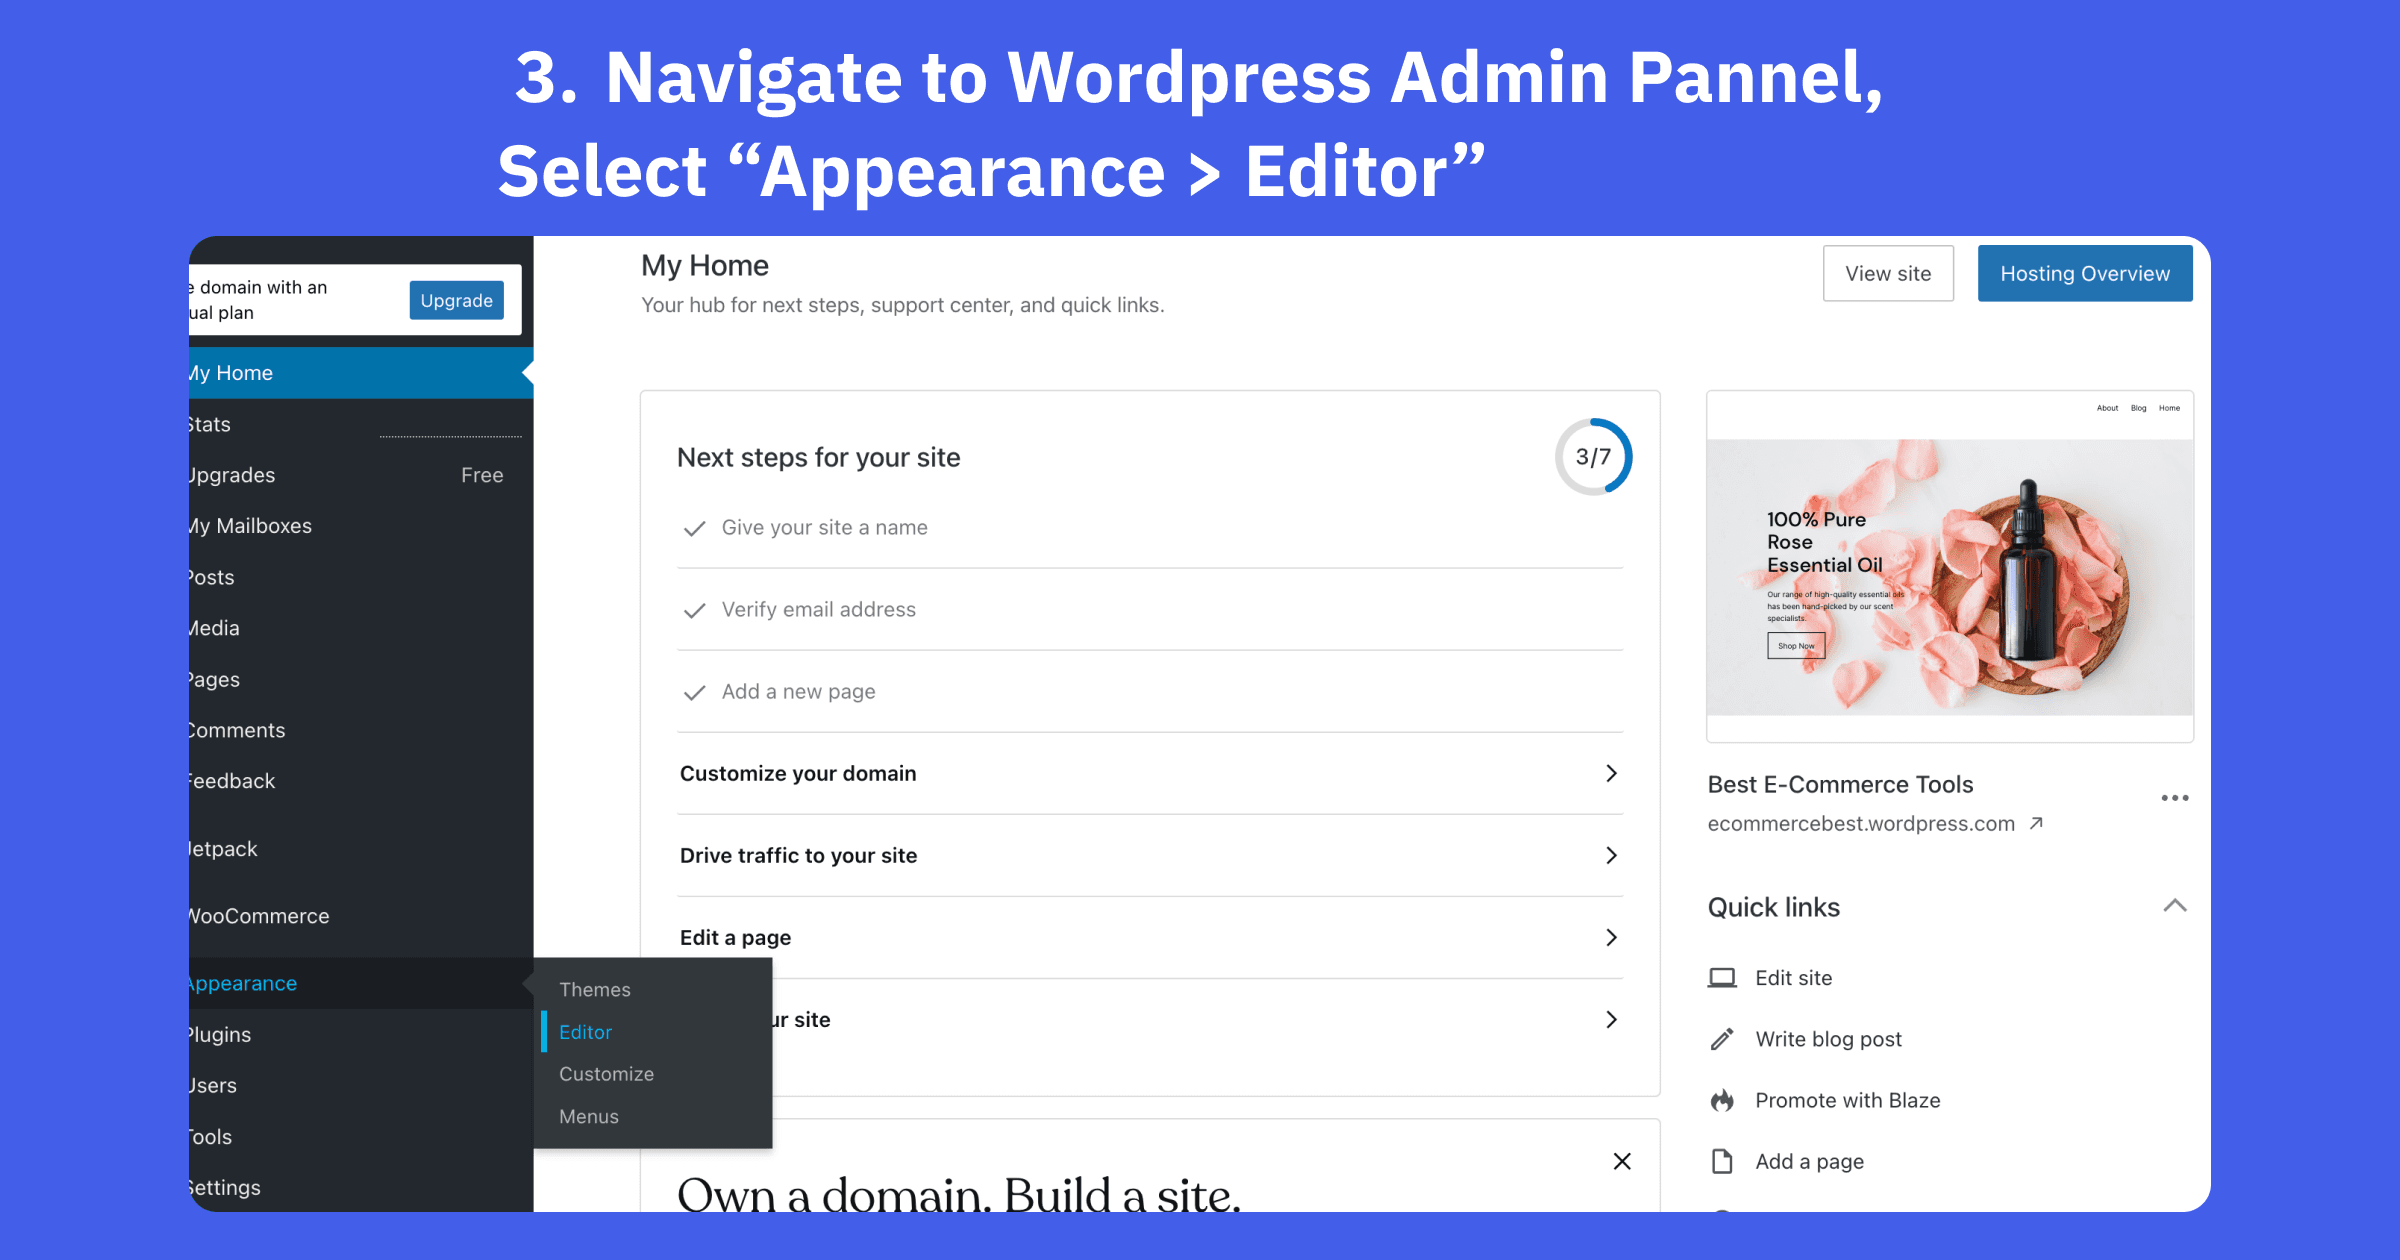
Navigate to WordPress Admin Panel, Select "Appearance > Editor"
Navigate to Appearance > Editor. From this Editor page, we will add Commenti Section.
Step 4
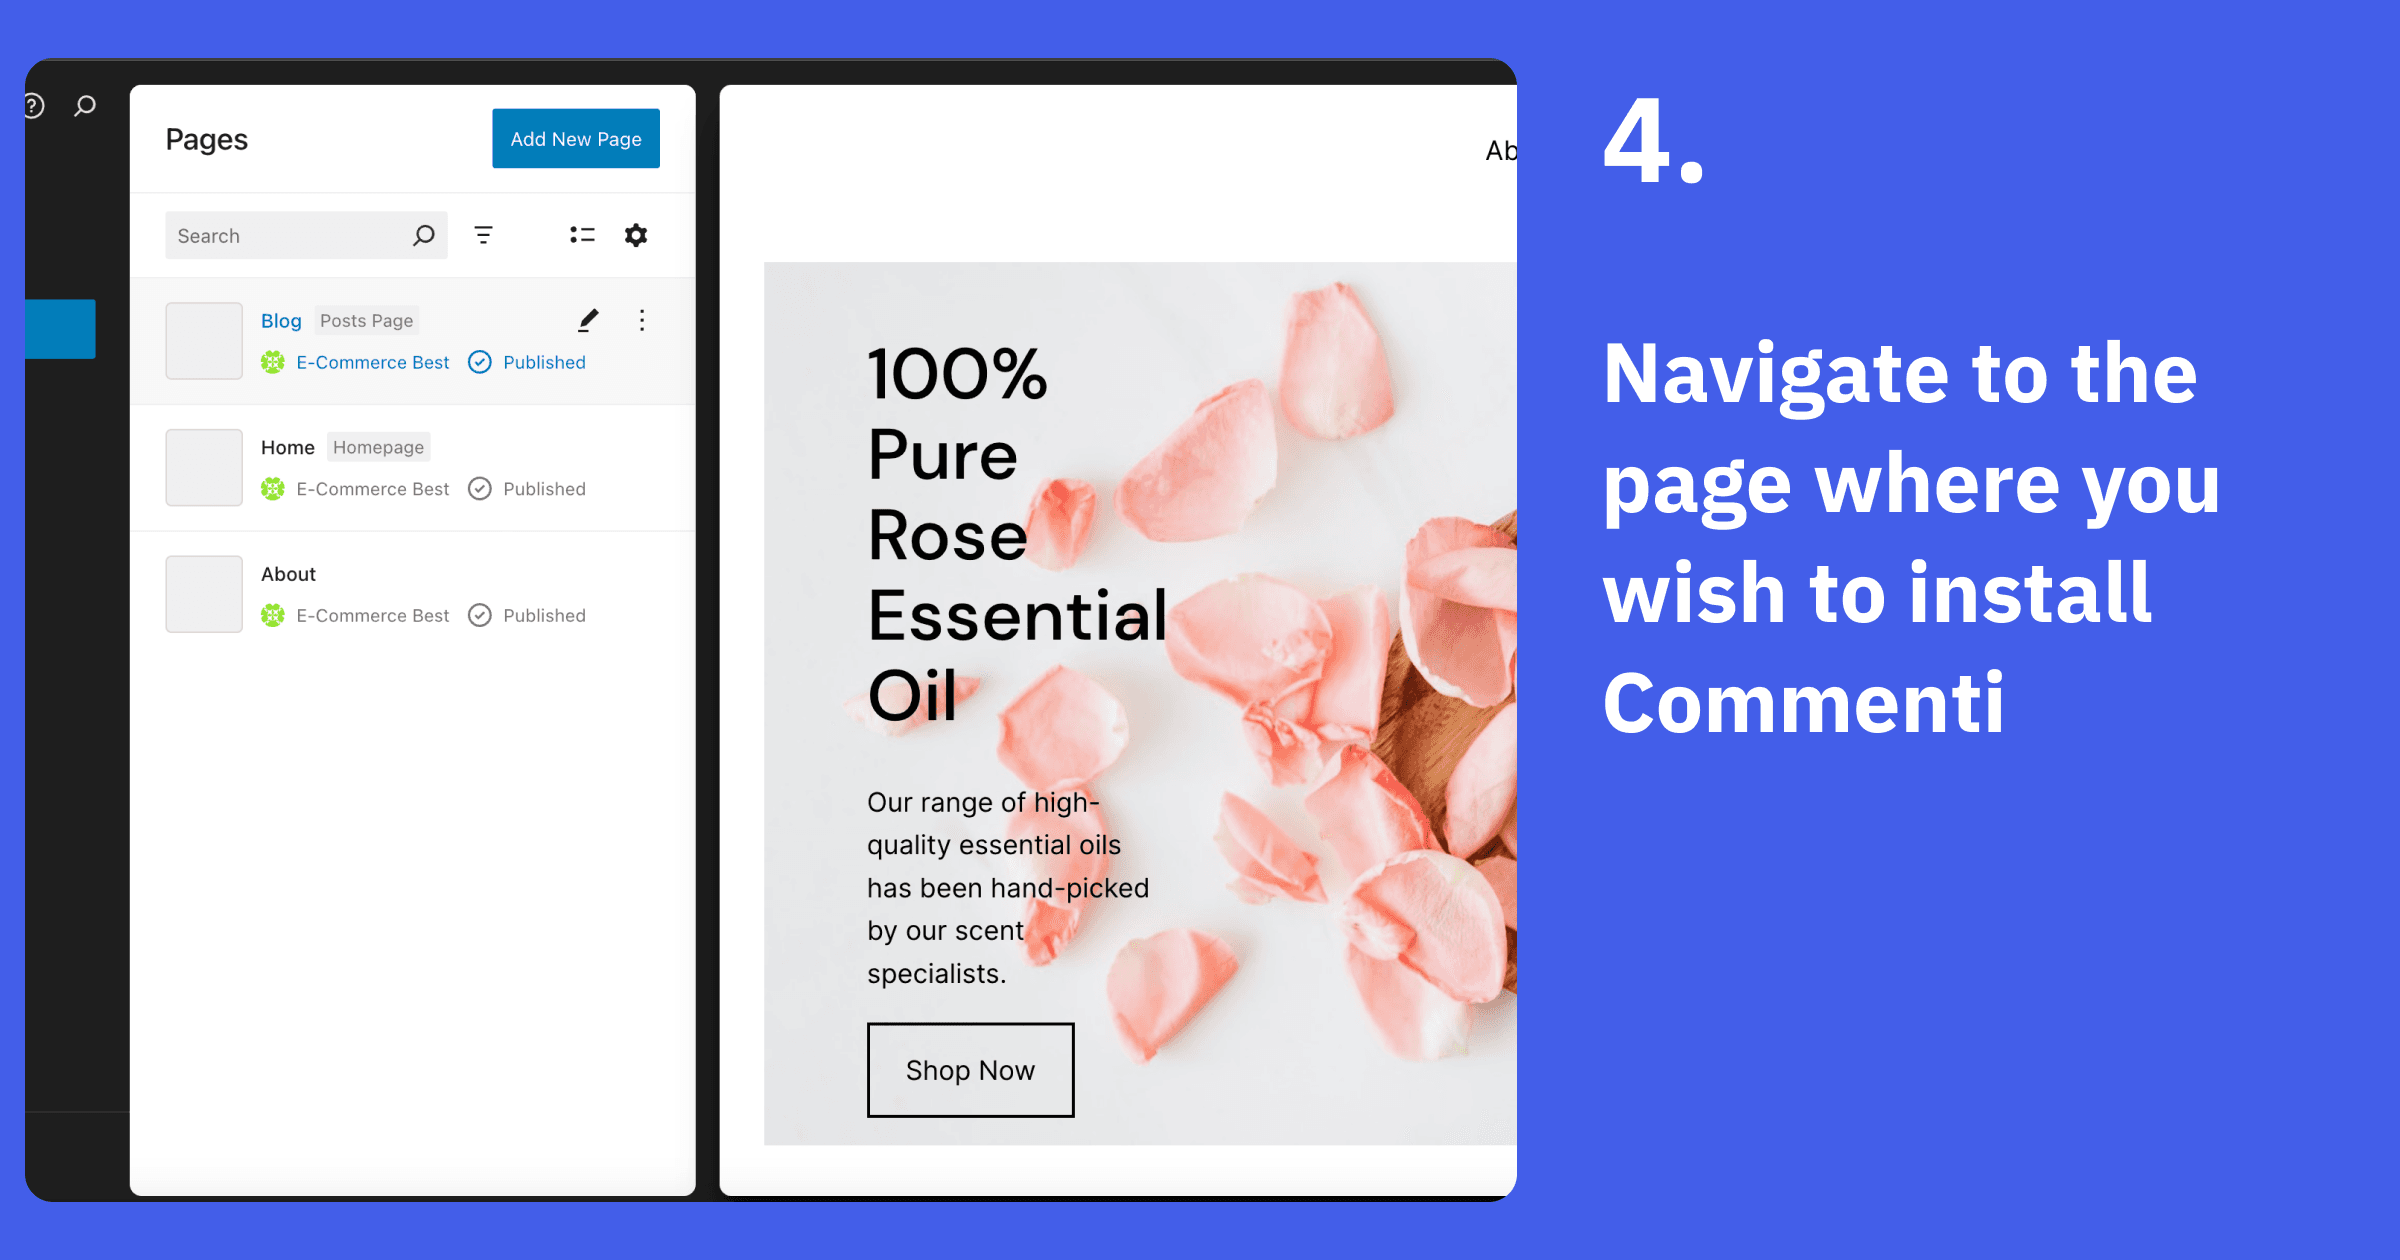
Navigate to the page where you wish to install Commenti
Choose the specific page or post where you want to add the Commenti section.
Step 5
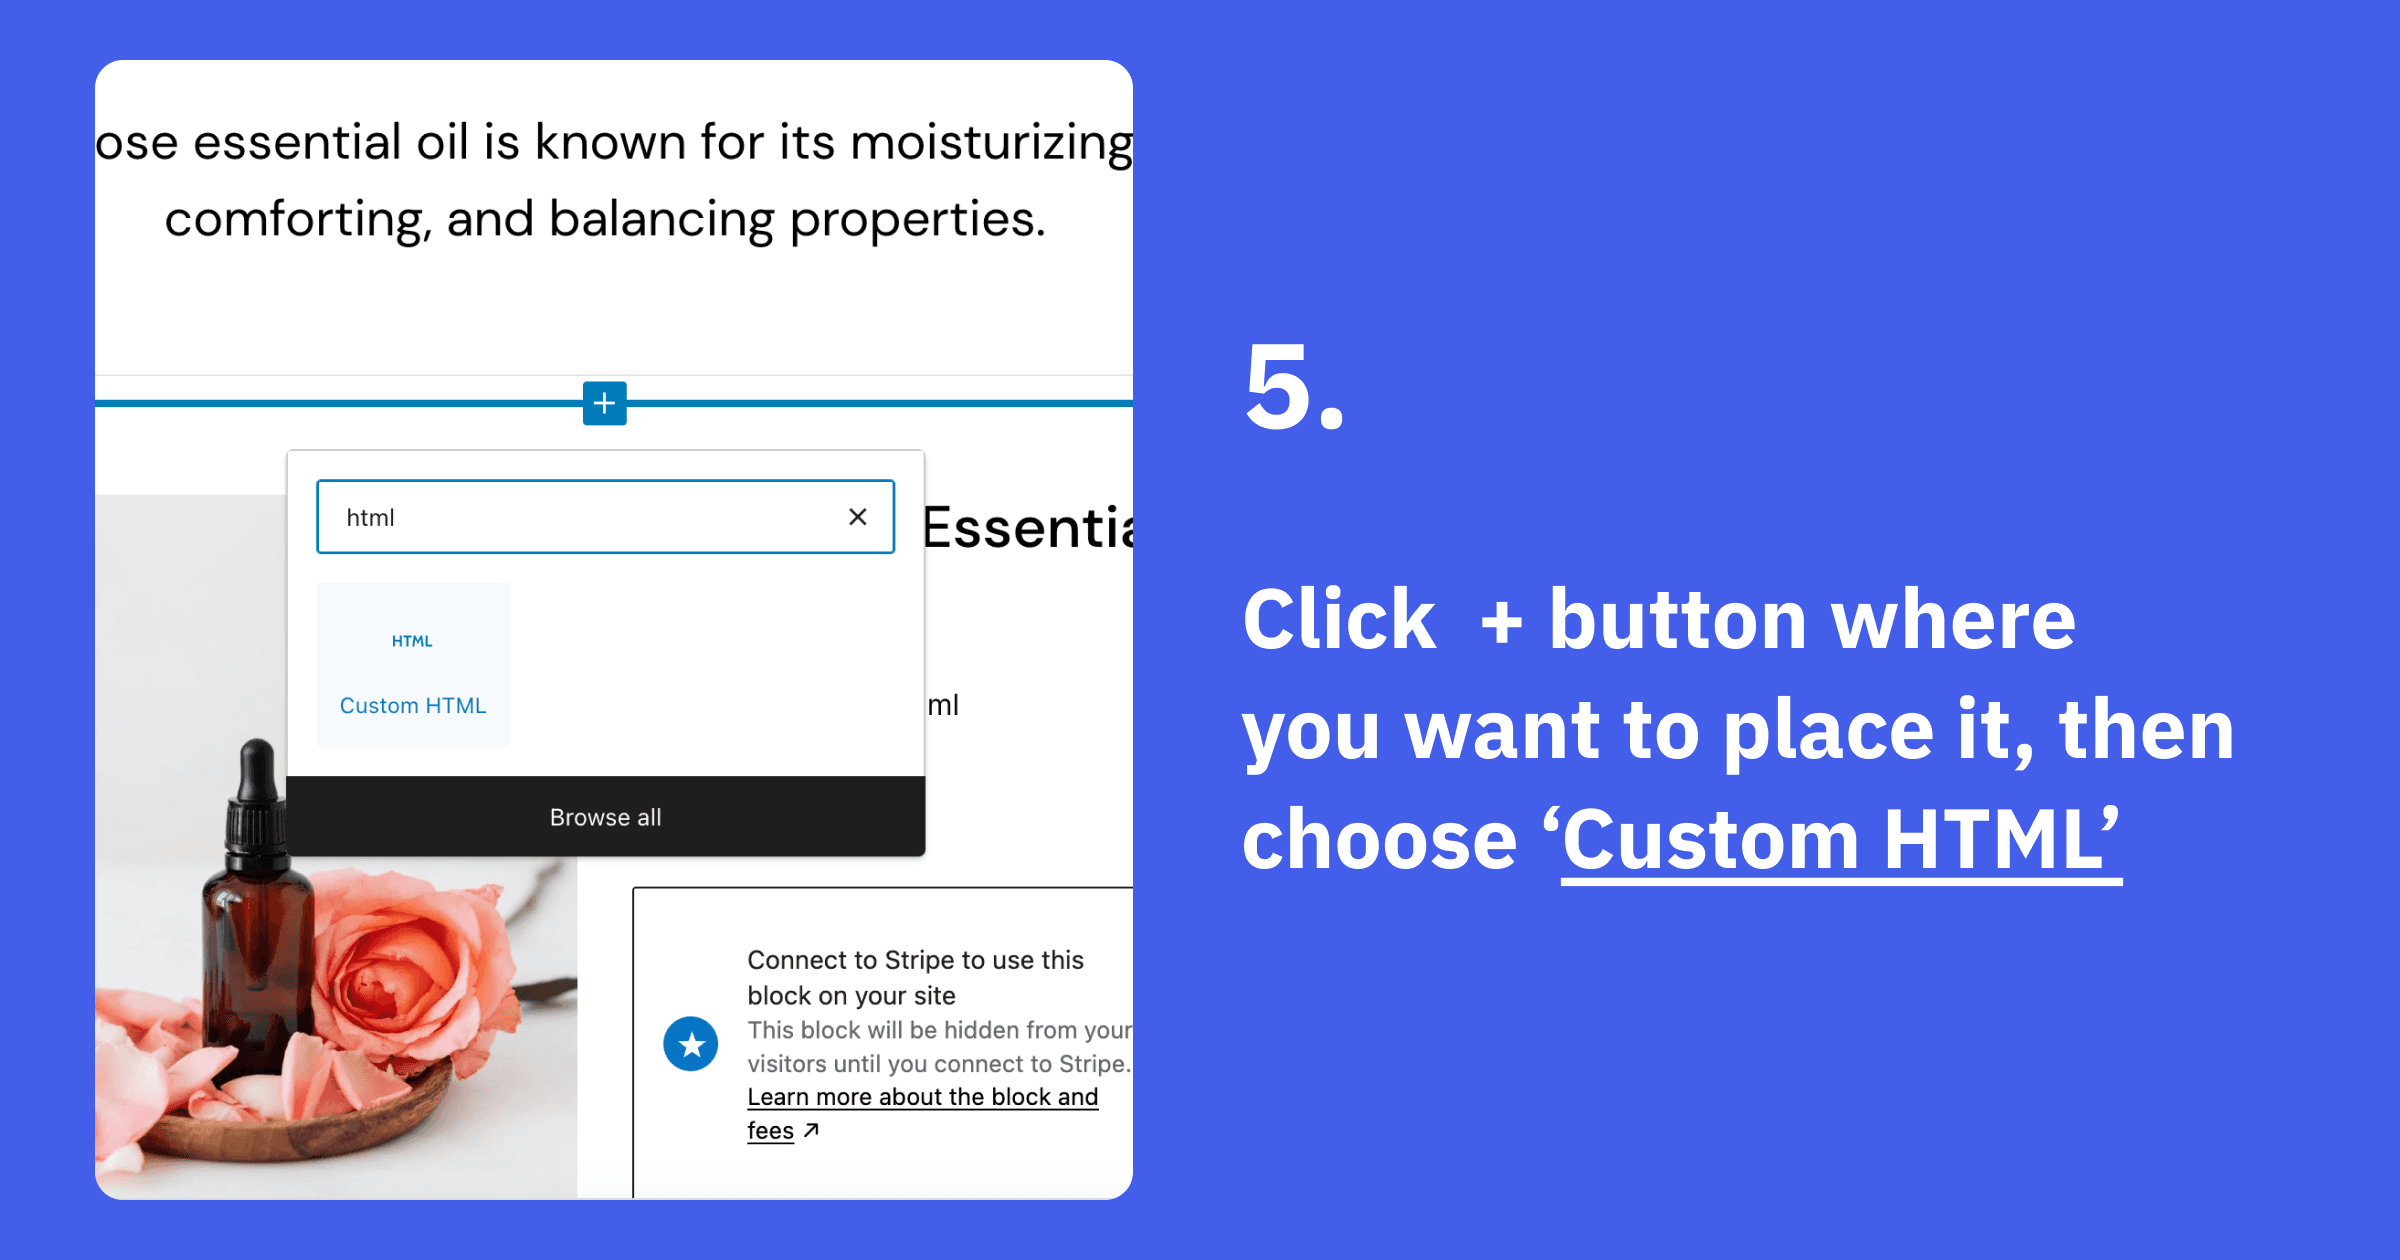
Click + button where you want to place it, then choose Custom HTML
Use the block editor to add a new Custom HTML block at the desired location on your page.
Step 6
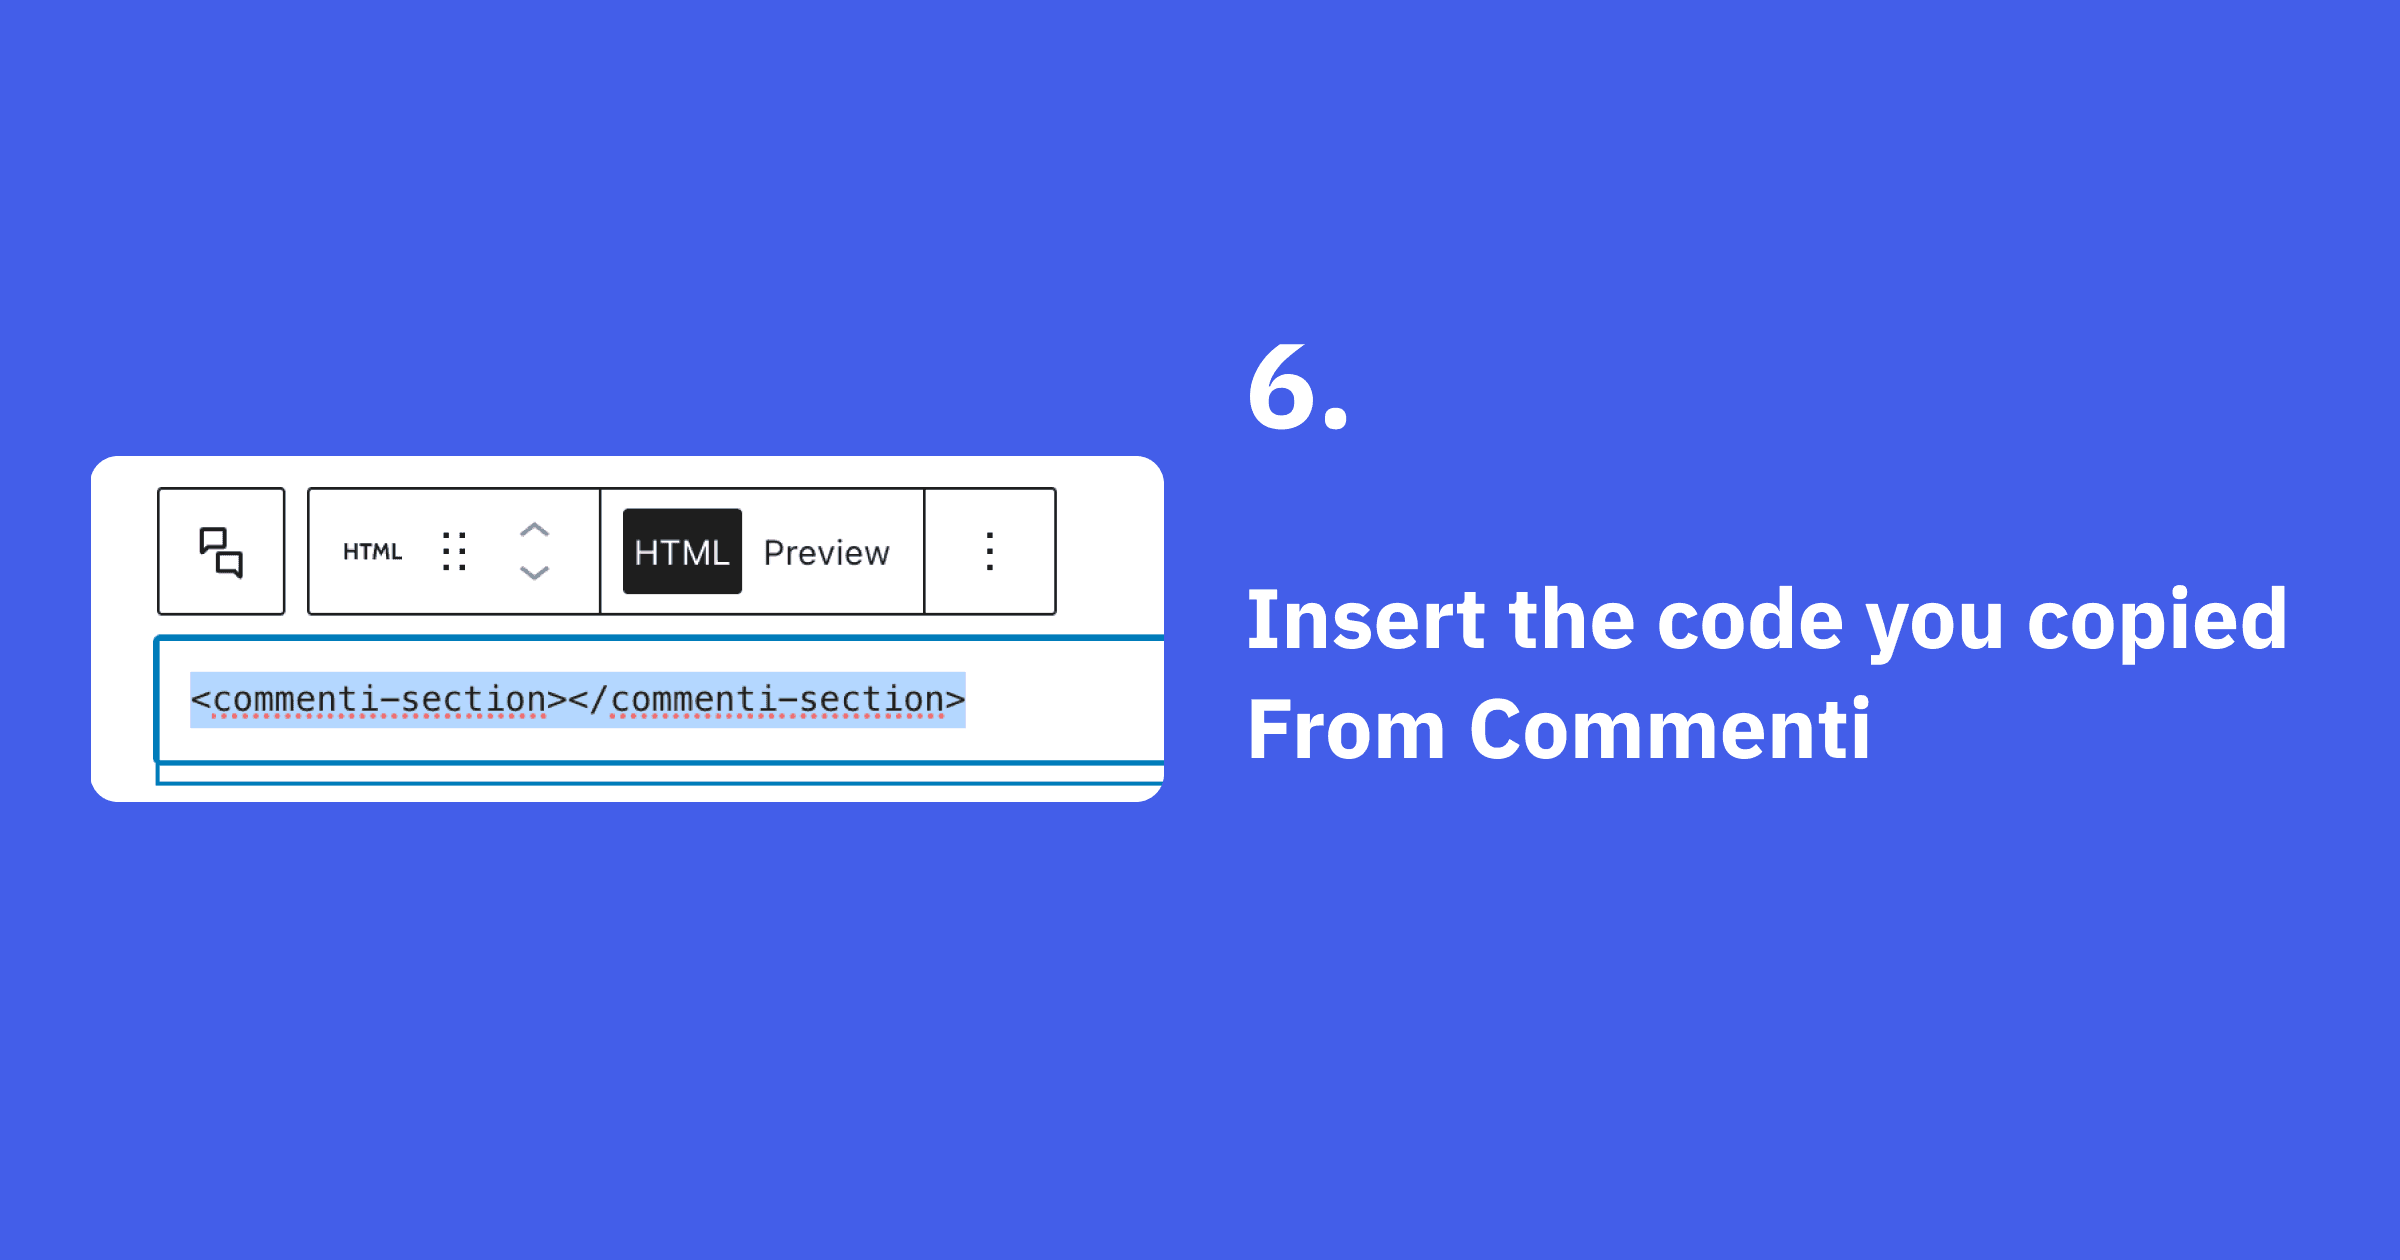
Insert Commenti code
Paste the Commenti section code you obtained from your Commenti dashboard into the Custom HTML block.
<commenti-section styles='{"text":"#ff0000"}'></commenti-section>Step 7
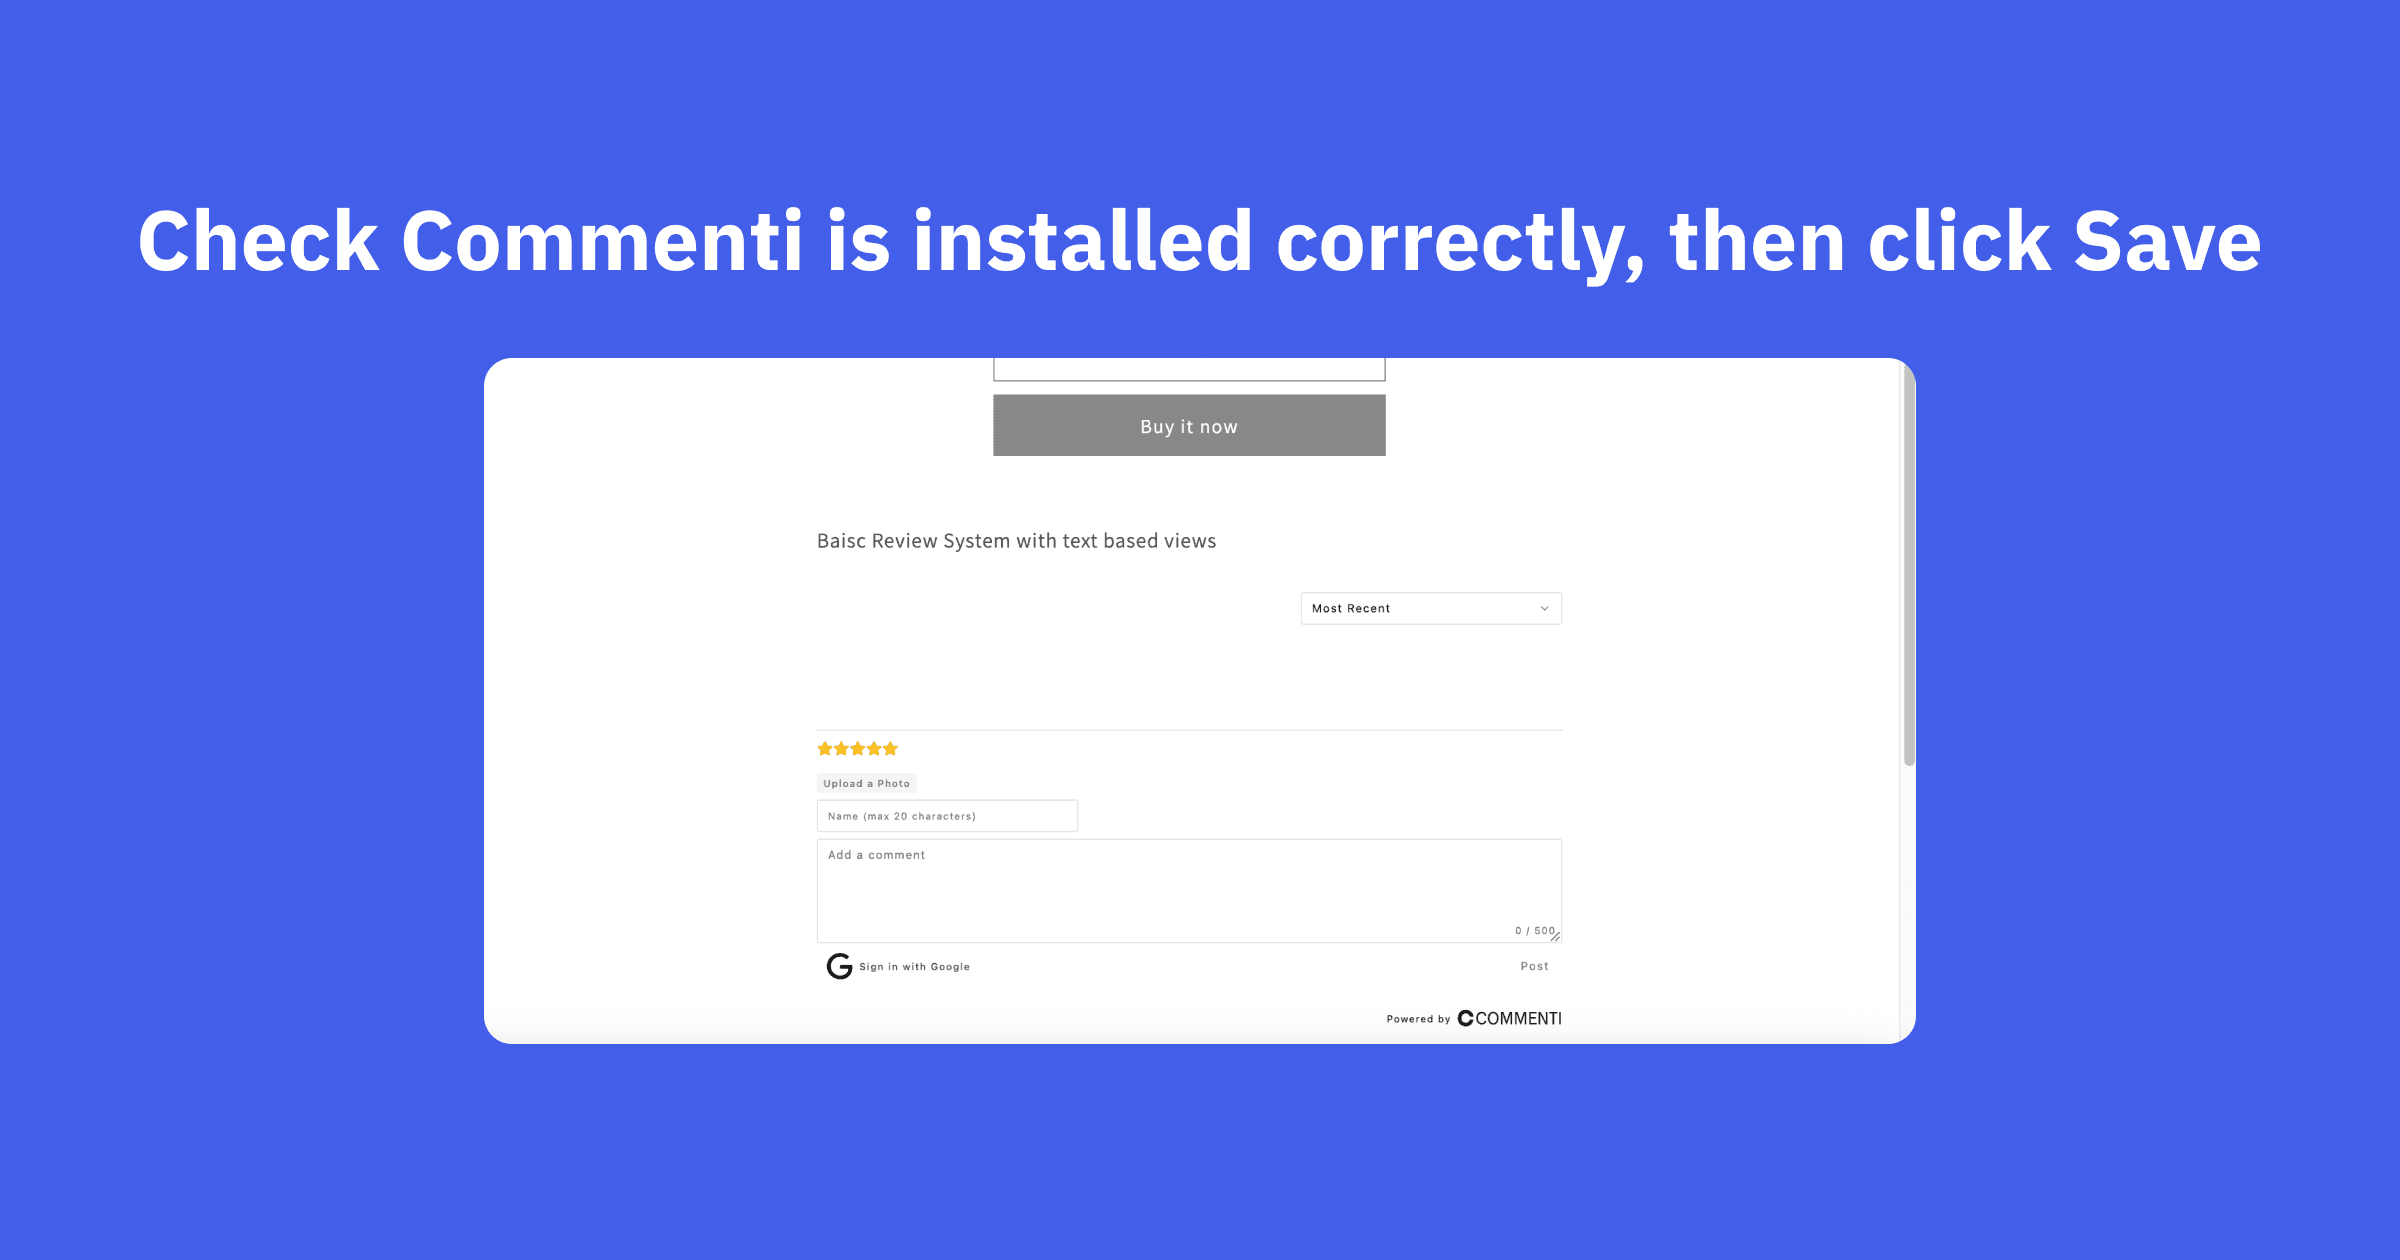
Check Commenti is installed correctly, then click Save
Verify that the Commenti section appears as expected in the editor preview, then save your changes to publish the updated page.
You're all set!
Commenti should now be working on your Wordpress store. Customize the appearance in your Commenti dashboard.