Installing Commenti on Your Website
Important Prerequisites
Before proceeding with installation, ensure you have:
- Registered your domain in the Commenti dashboard
- Added the specific pathname for your product or page
- Customized your Commenti appearance (detailed in Step 1 below)
Failure to complete these steps will result in Commenti not functioning correctly on your site.
Installation Steps
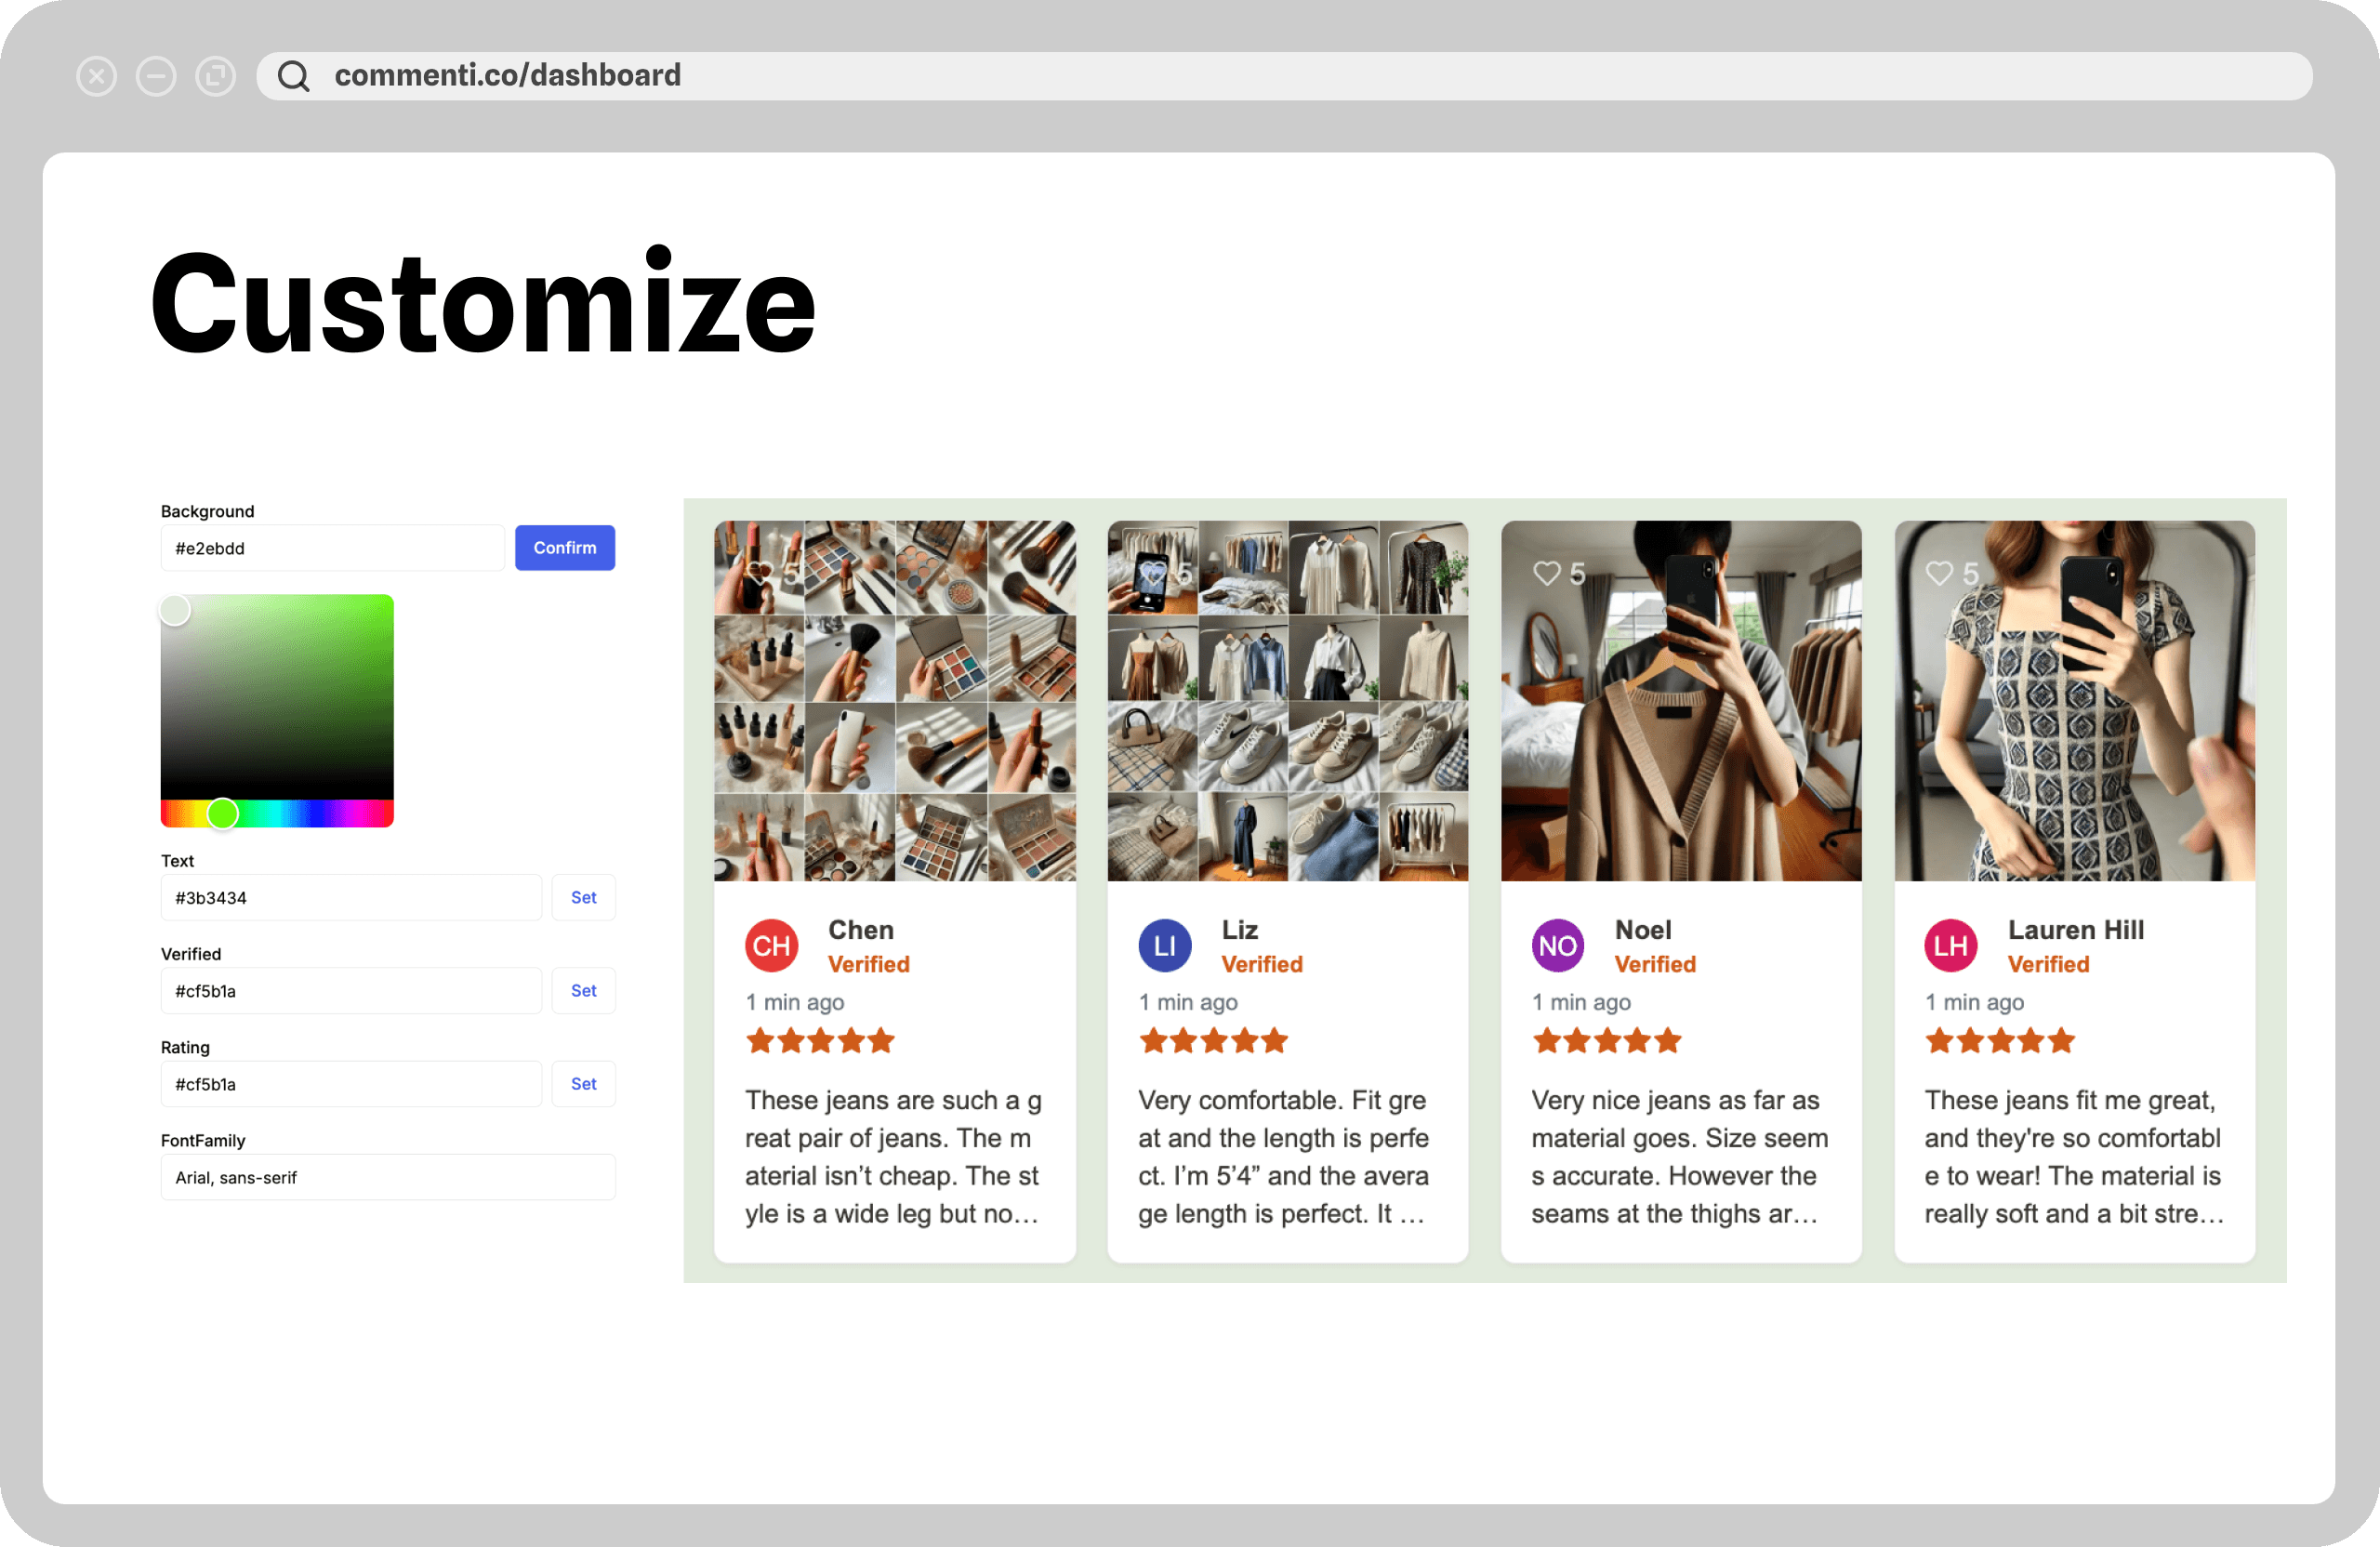
Step 1: Customize Your Commenti Appearance
Before copying any code, customize your Commenti appearance:
- Go to your Commenti dashboard
- Navigate to the "Install & Customize" section
- Adjust colors, fonts, and other styling options to match your website
- Preview your changes in real-time
- Save your customizations
Customization is Crucial
The code snippets in the following steps will reflect your customizations. Make sure to complete this step before proceeding.
Step 2: Add the Script
Copy the following script and paste it into the <head> section of your HTML file. This loads the Commenti library.
<script async src="https://package.commenti.co/commenti.umd.js"></script>
Step 3: Add the Component
Copy the following component and paste it where you want the comments to appear in the <body> of your HTML file. This snippet includes your customized styles.
<commenti-section
  styles=' ... if you set style customization this will appear'
></commenti-section>
You're All Set!
After adding both snippets, Commenti should now be working on your website. The component will appear wherever you placed the
<commenti-section> tag.Additional Notes
- Ensure the script is loaded in the
<head>before using the component in the<body>. - The styles in the component tag reflect your customizations. If you update your styles in the dashboard, you'll need to update this code as well.
- For dynamic websites or single-page applications, ensure the Commenti script is loaded before rendering the component.
If you encounter any issues during installation, please don't
hesitate to contact our support team. We're here to ensure
Commenti works seamlessly on your website. For more information on registering domains and pathnames, see our
Dashboard Guide.