How to add reviews on Any Website in 5 mins
Important Prerequisites
Before proceeding with installation, ensure you have:
- Registered your domain in the Commenti dashboard
- Added the specific pathname for your product or page
- Customized your Commenti appearance
Failure to complete these steps will result in Commenti not functioning correctly on your site.
Learn more about how to register >Learn more about how to customize Reviews >Step 1

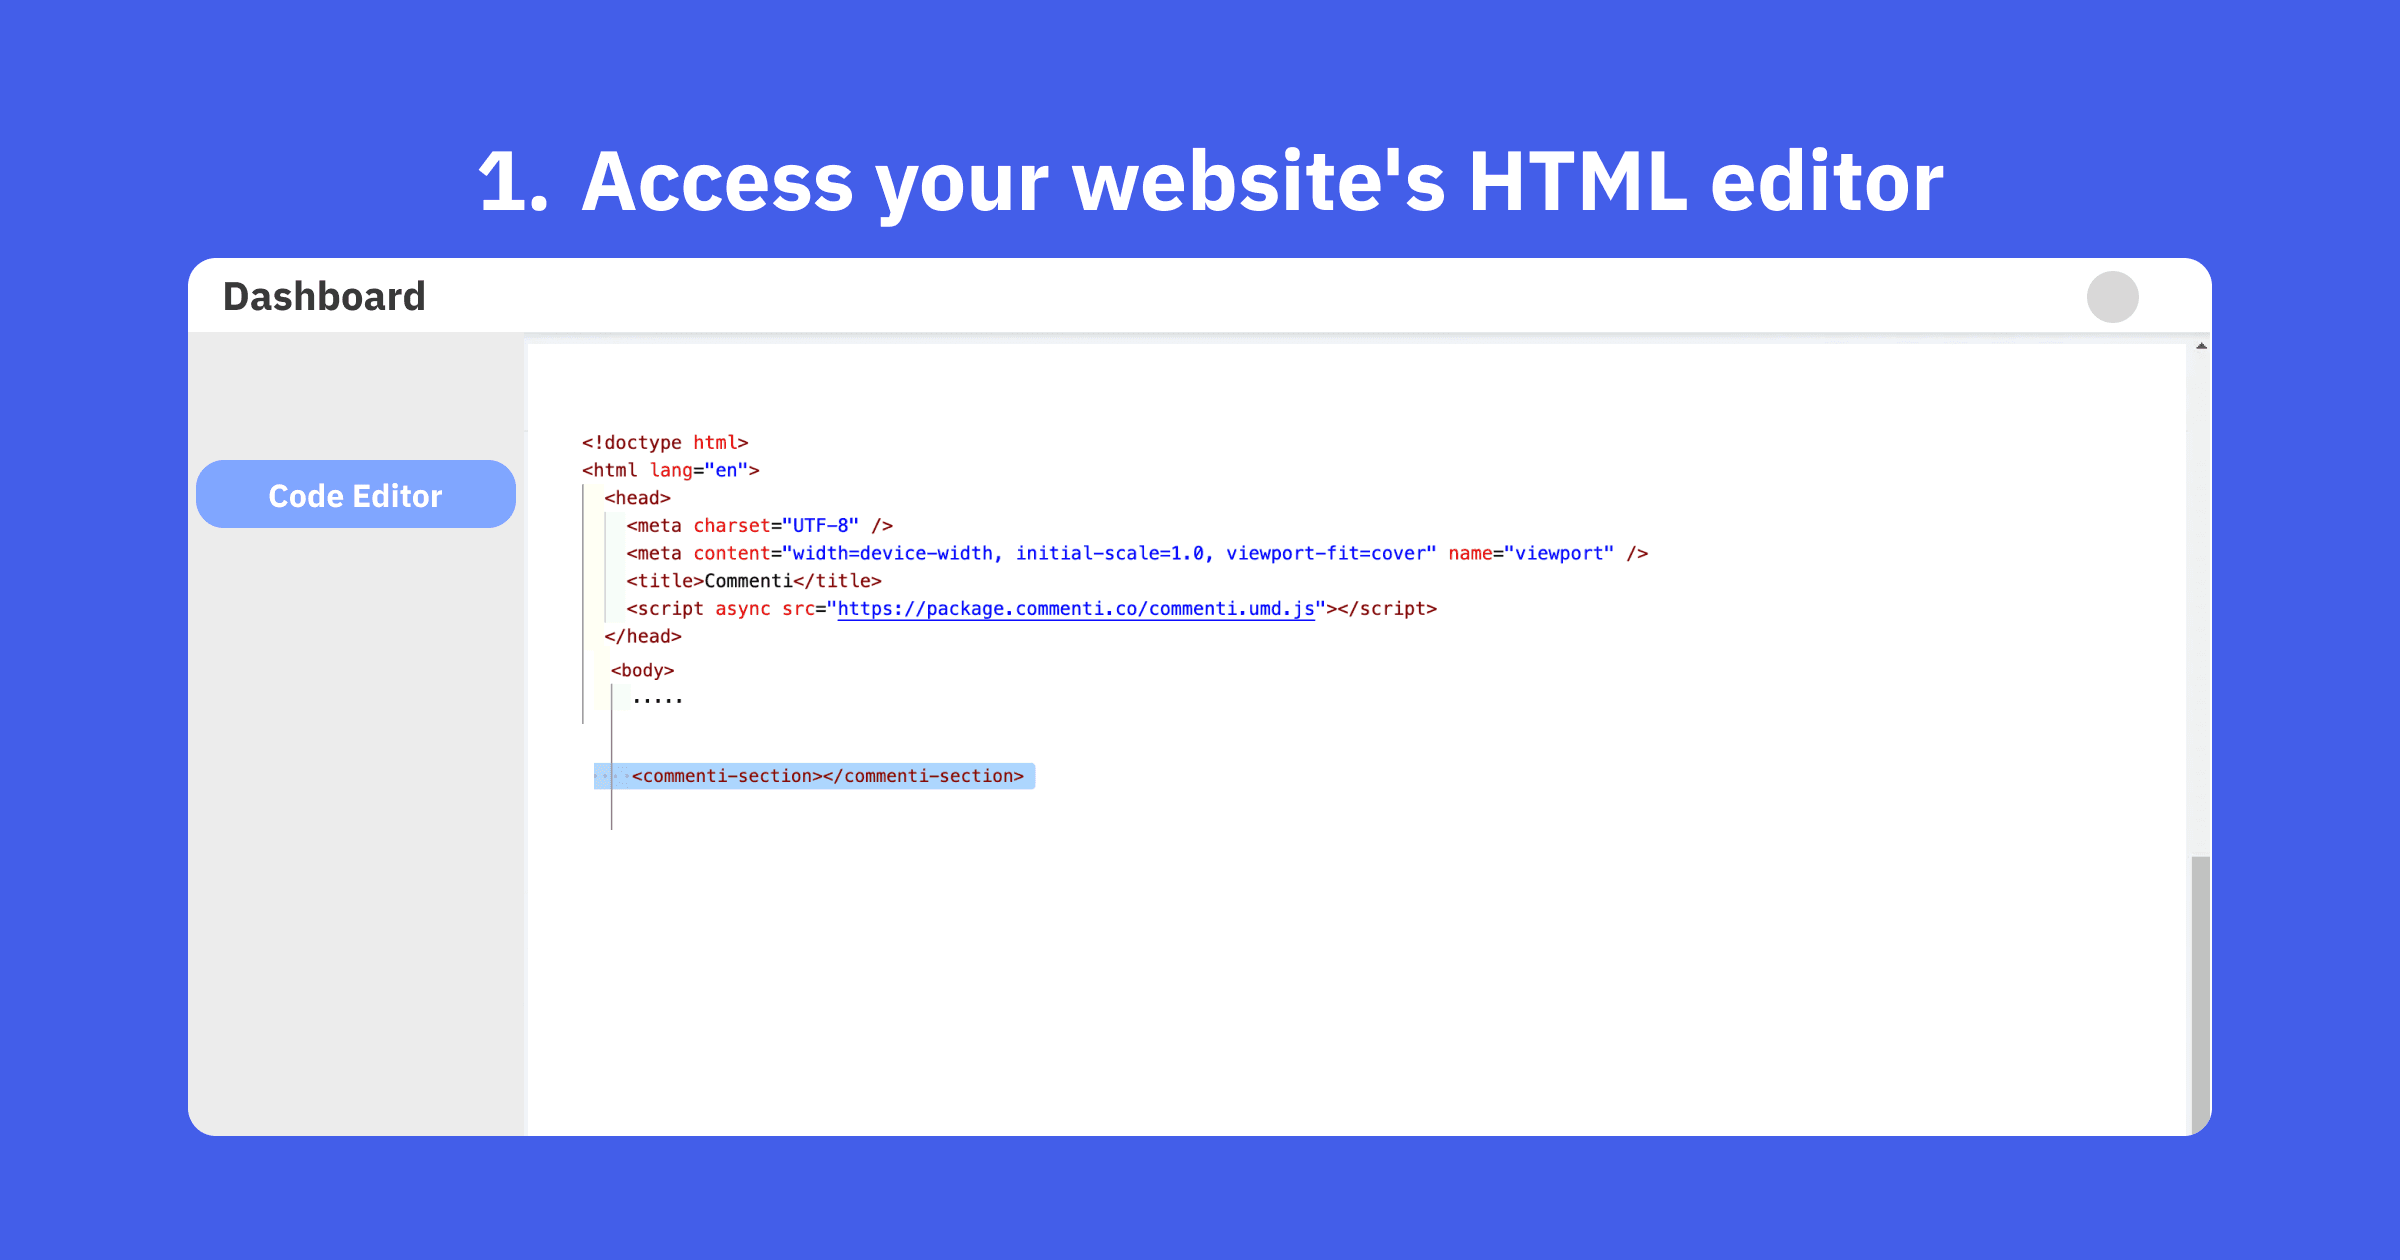
Access your website's HTML editor
Open your website's HTML file or access your site builder's HTML editor. This process may vary depending on your hosting provider or site builder platform.
Step 2

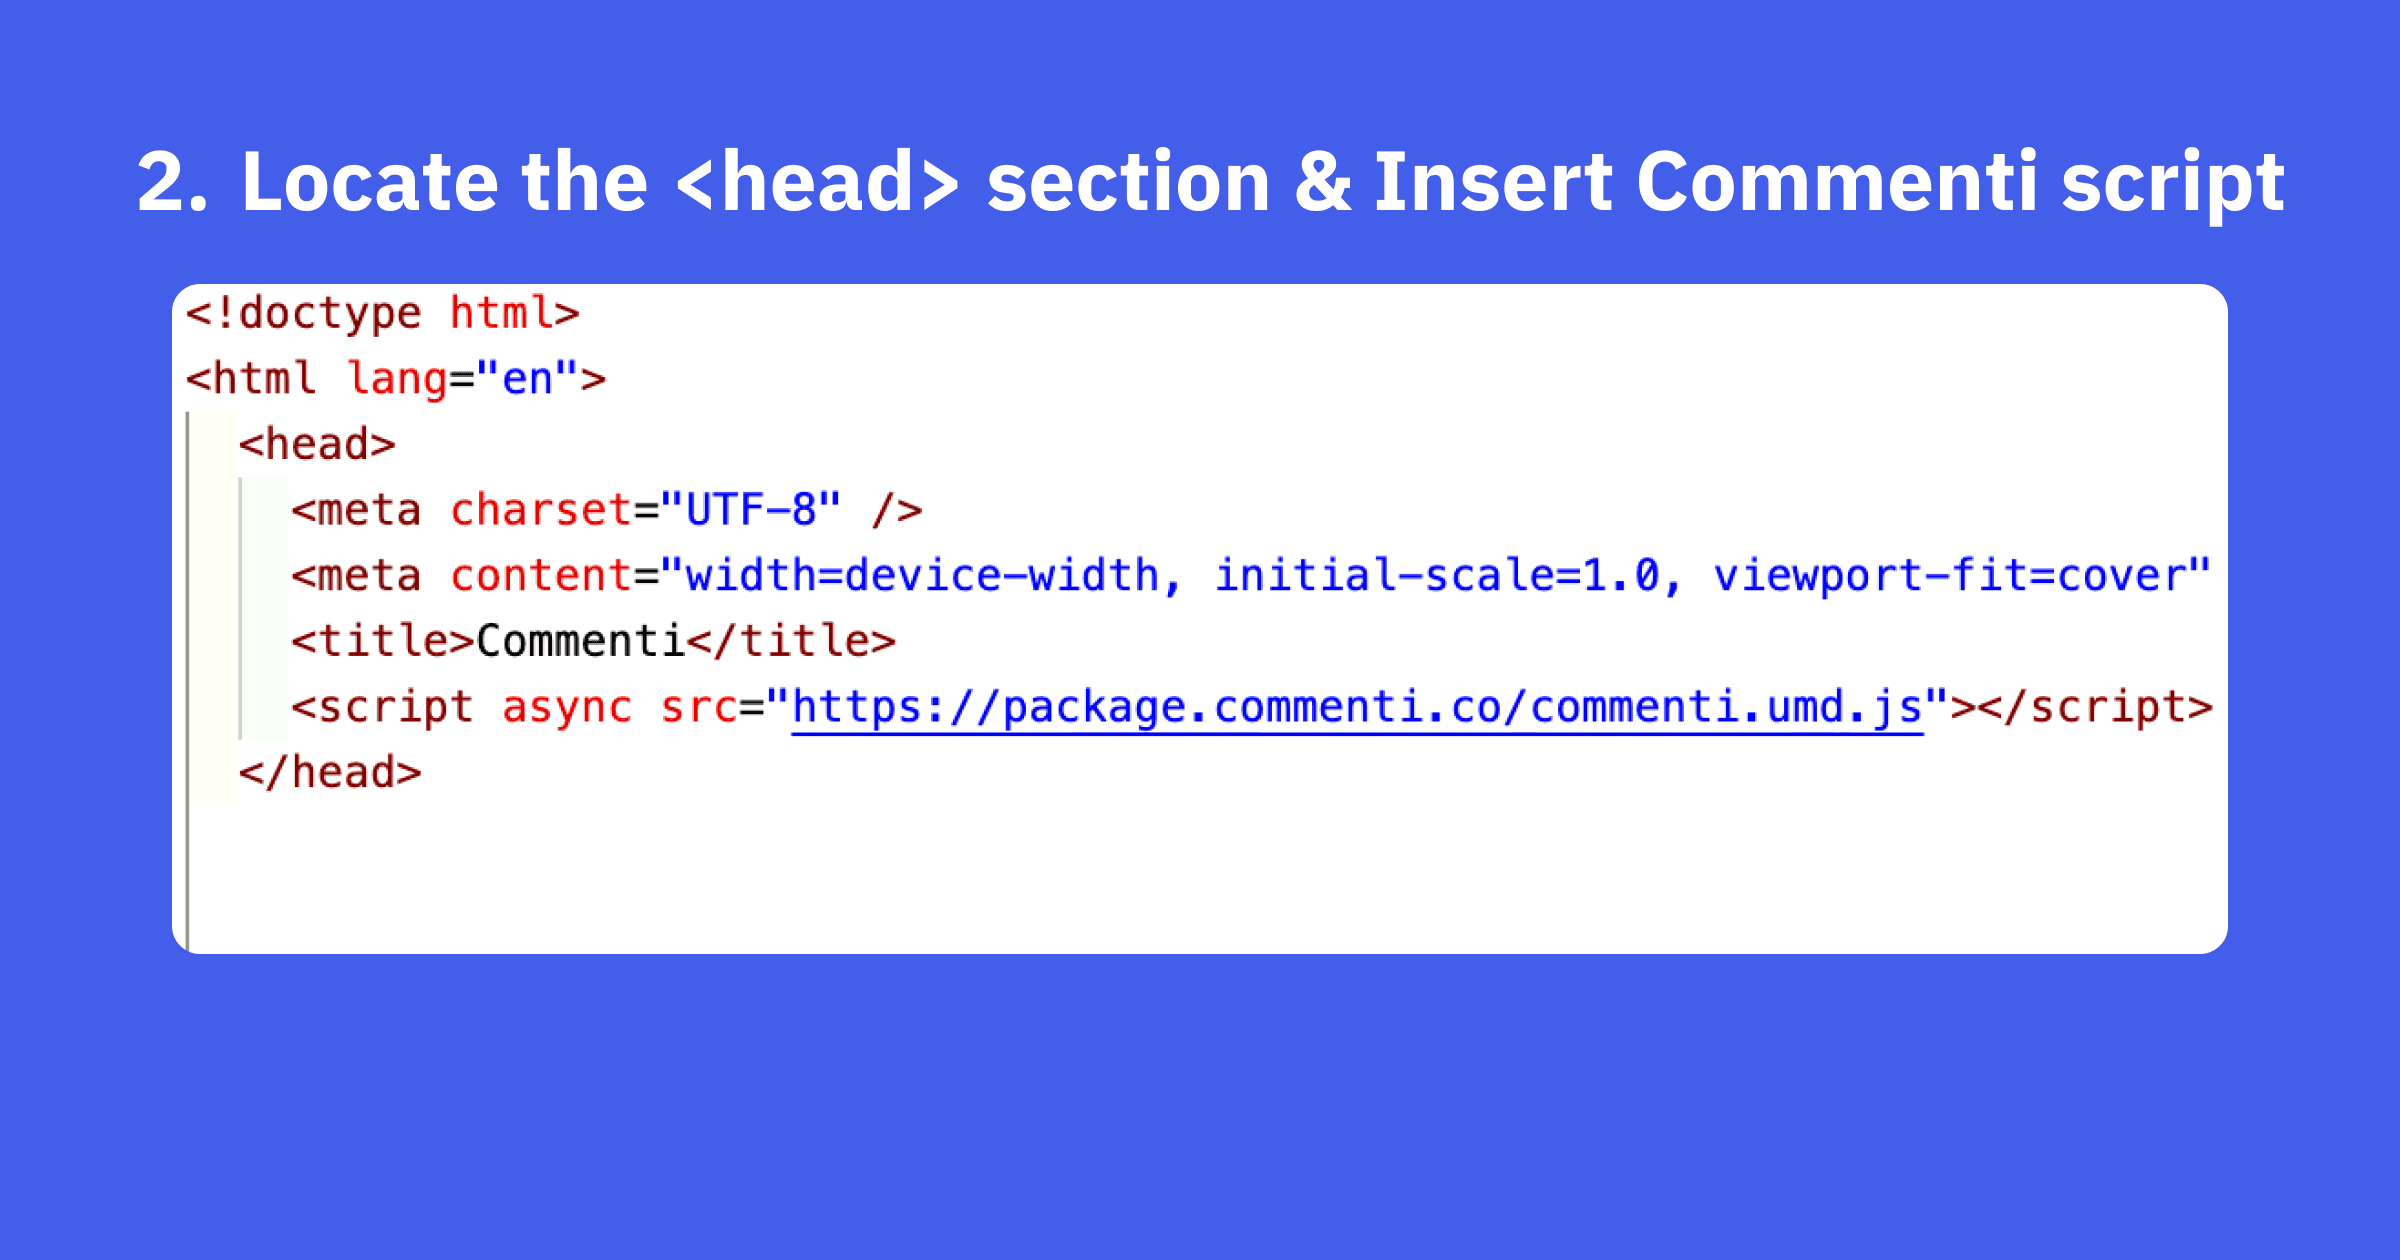
Locate the <head> section & Insert Commenti script
Find the <head> section in your HTML file. This is typically near the top of the document. Then Copy the Commenti script tag from your Commenti dashboard and paste it just before the closing </head> tag in your HTML file.
<script async src="https://package.commenti.co/commenti.umd.js"></script>
Step 3

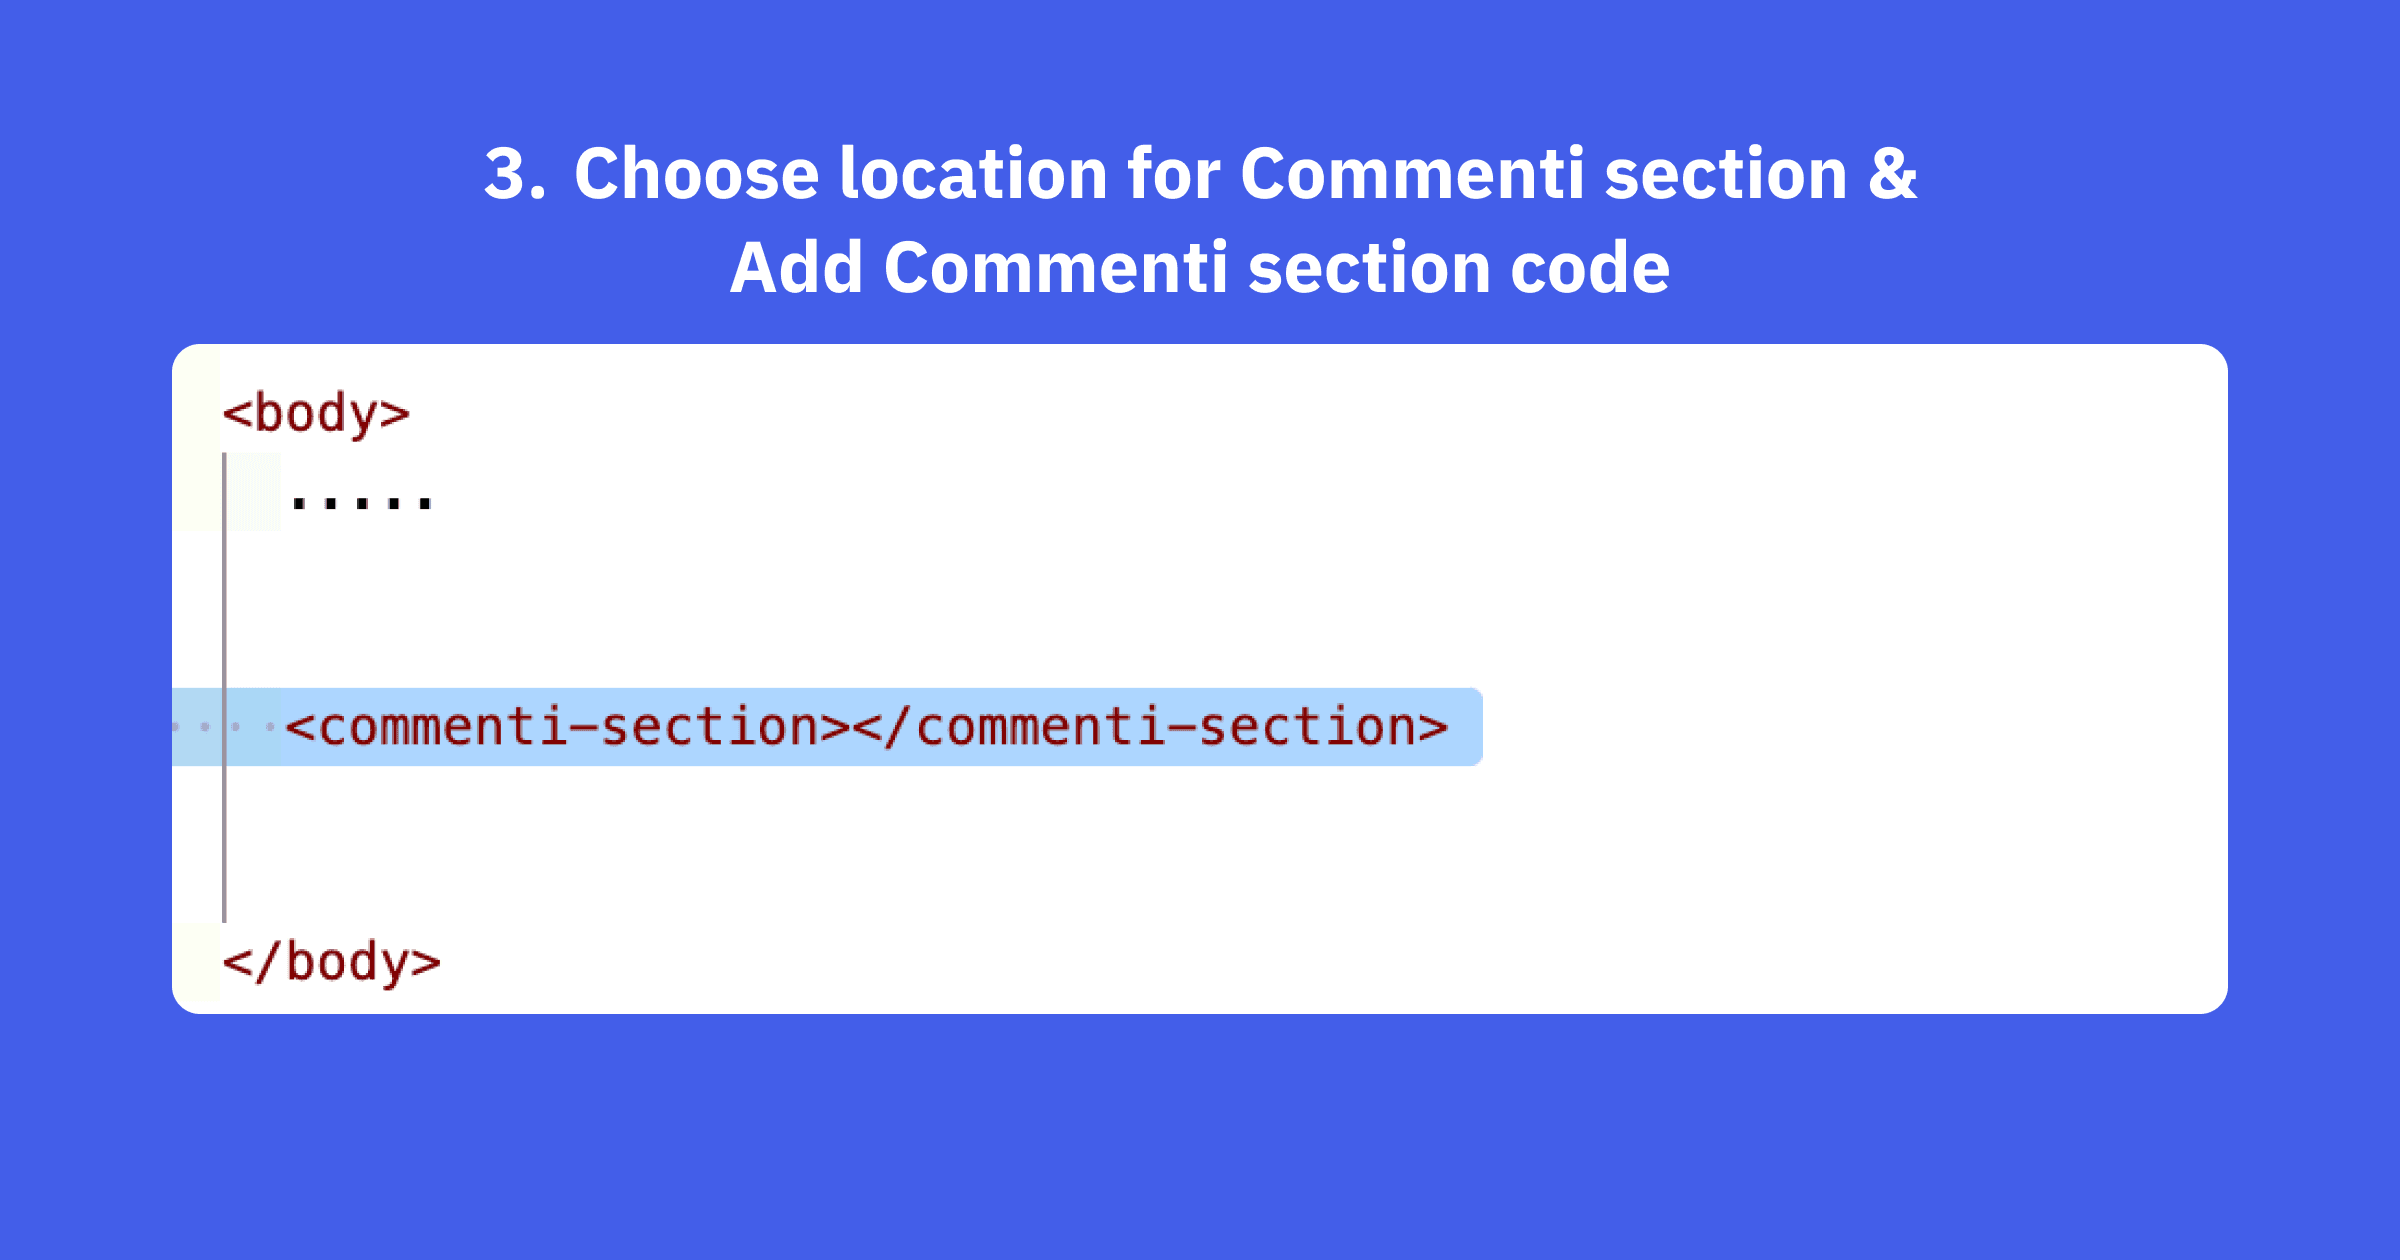
Choose location for Commenti section & Add Commenti section code
Decide where you want the Commenti section to appear on your page. This could be at the bottom of a product page, in a dedicated reviews section, or any other suitable location. At your chosen location in the HTML, add the Commenti section code. This is typically a <commenti-section> custom element tag. At your chosen location in the HTML, add the Commenti section code. This is typically a <commenti-section> custom element tag.
<commenti-section styles='{"text":"#000000"}'></commenti-section>Step 4

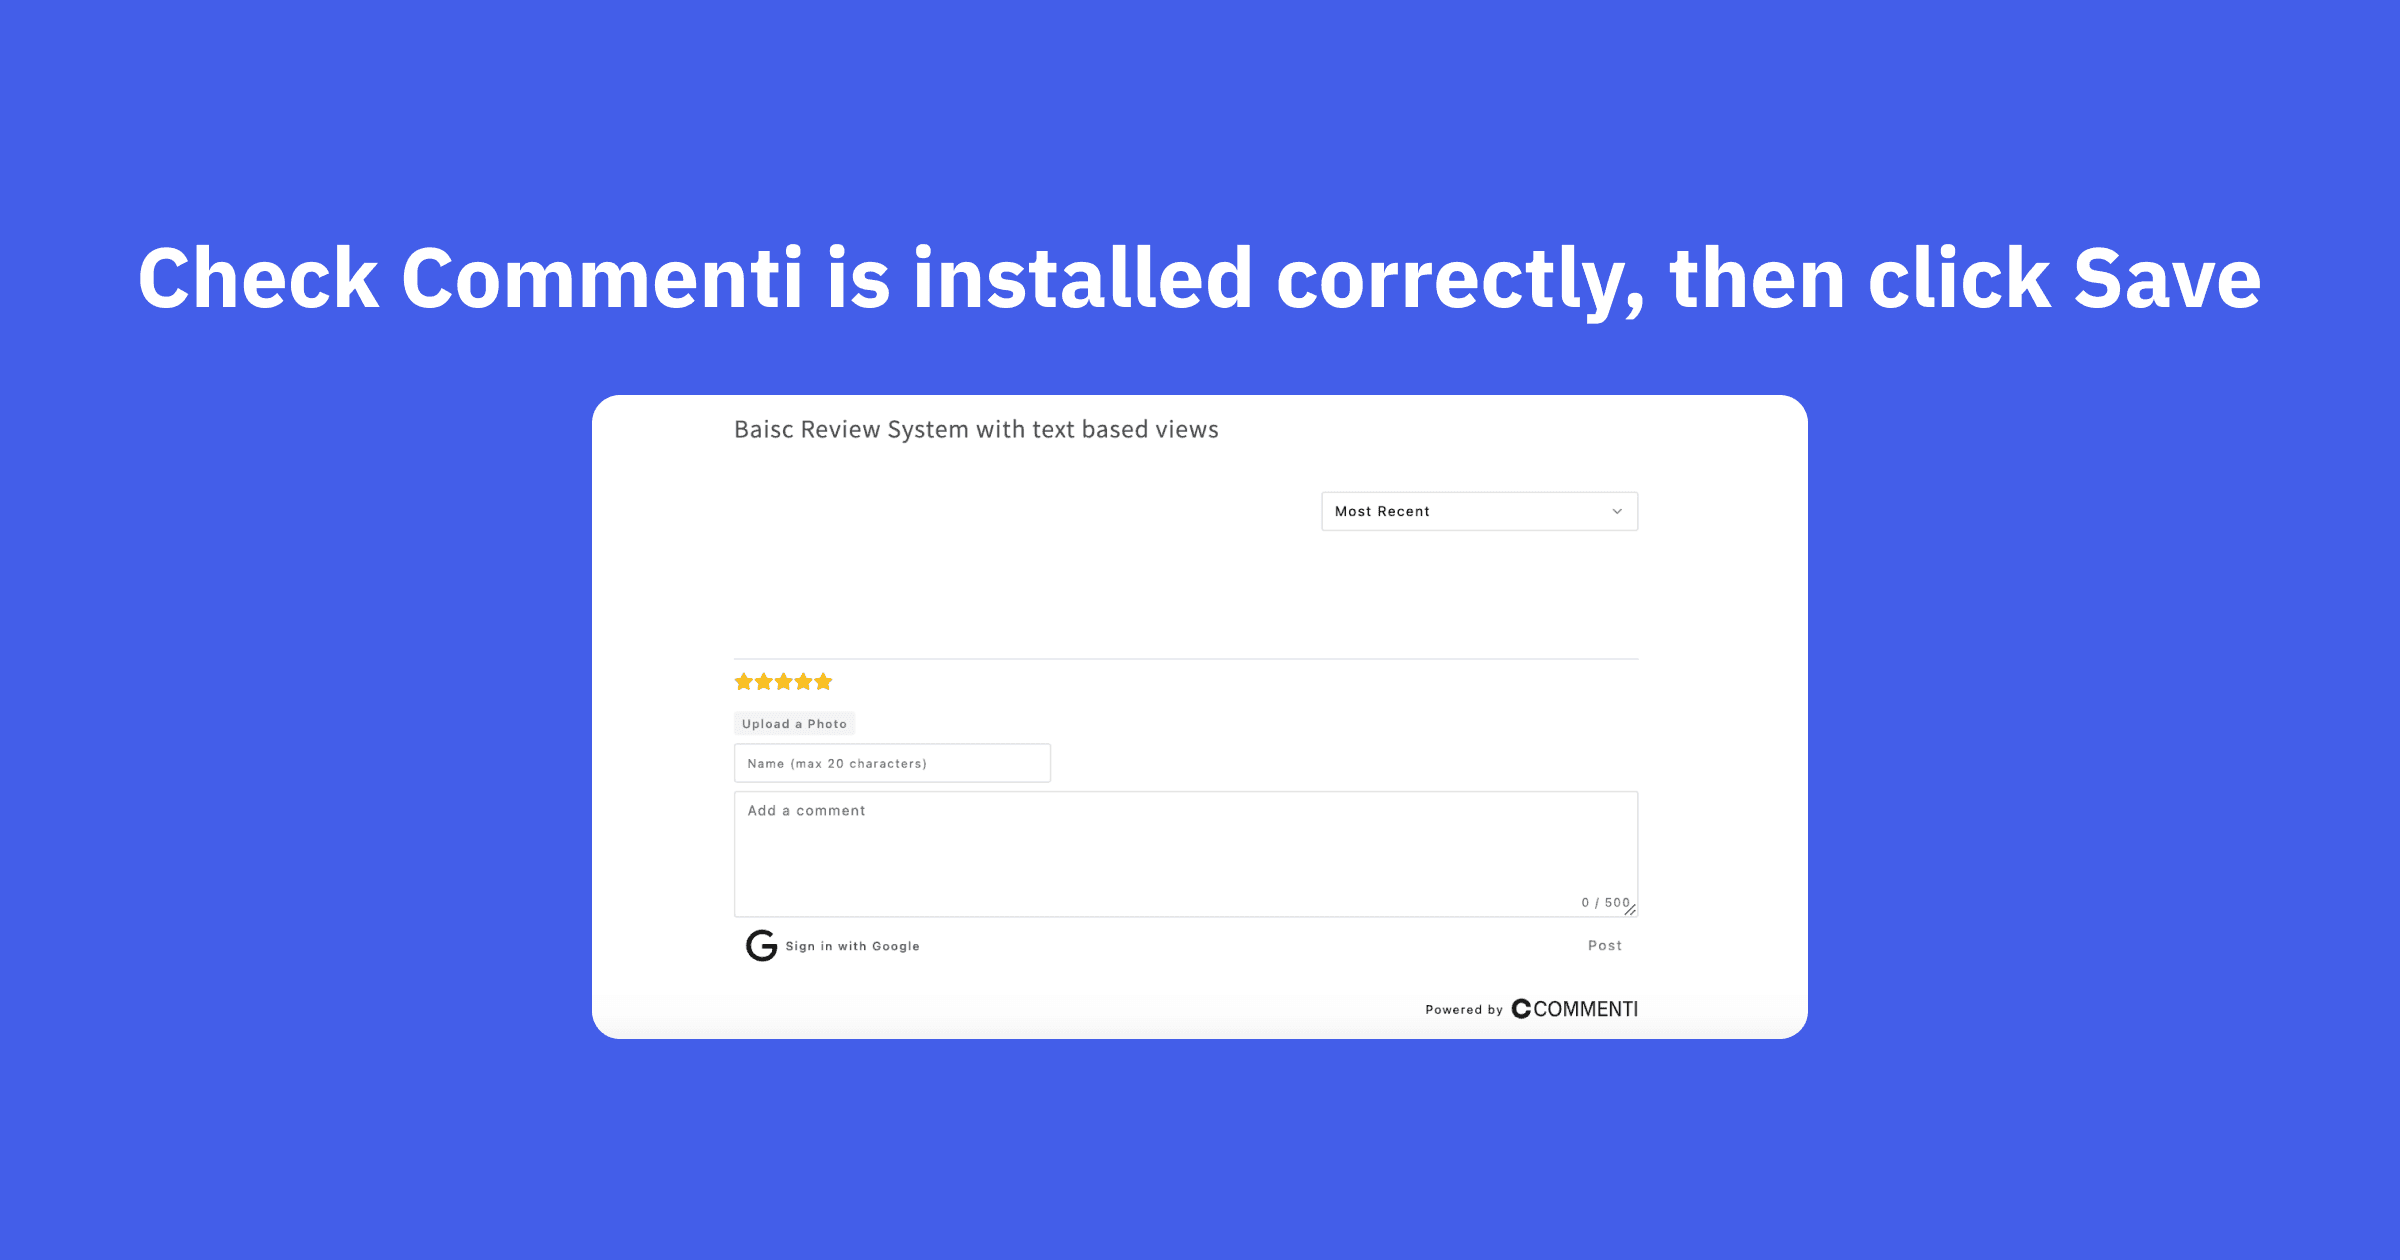
Save and publish changes
Save your changes and publish or upload the updated HTML file to your web server. Verify that the Commenti section appears correctly on your live website.
You're all set!
Commenti should now be working on your Any Website store. Customize the appearance in your Commenti dashboard.